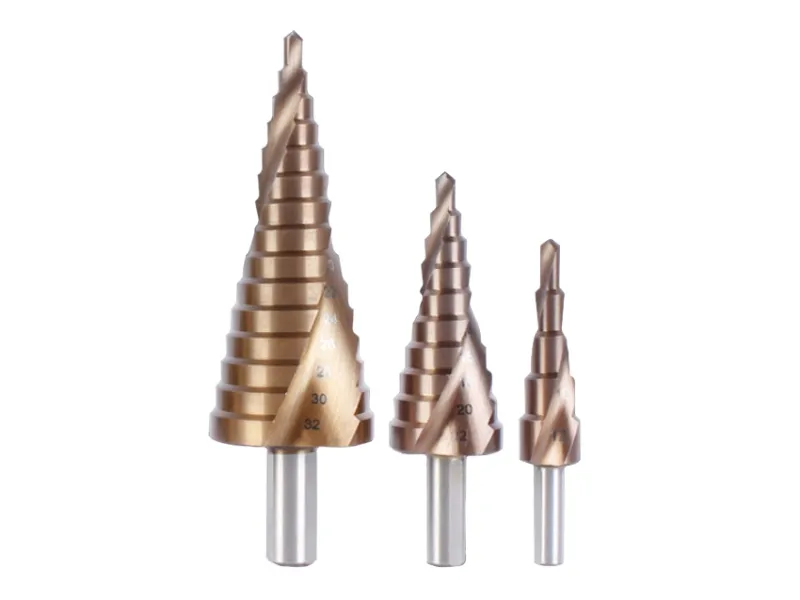
What Are Step Drill Bits Used For
October. 14, 2025
A step drill bit is a cone-shaped bit with “steps” that let you drill several hole sizes with one tool. At PTATools, we design and manufacture precision step drill bits that deliver clean, accurate holes across multiple diameters—all in one tool.

What is a Step Drill Bit?
A step drill bit has multiple increasing diameters machined into a taper. As you drill, each step enlarges the hole to the next size. This geometry excels in thin materials—sheet metal, stainless sheet, aluminum, brass, copper, plastics, and laminates—because the step acts like a built-in pilot and often leaves a cleaner, rounder hole with less grabbing than a standard twist drill.
Typical ranges include imperial (for example, 1/8" to 1-3/8") and metric versions, as well as sets that cover common electrical conduit trade sizes.
Best Applications: When to Use One
Step bits are favorites for trades that work in thin stock:
● Electrical and panel building: Junction boxes, enclosures, control panels, conduit/grommet holes.
● HVAC: Duct penetrations in galvanized sheet; sheet-metal transitions and takeoffs.
● Light fabrication/automotive: Body panels, brackets, guards.
● Plastics and laminates: Acrylic, polycarbonate, HPL panels—when used at slower RPM to avoid melting.
● Everyday tasks: Enlarging a mis-sized hole, cleaning up a rough edge, or deburring as you go.
Because each step can lightly chamfer the edge, you can drill and deburr in one operation.
Limits and Myths: When Not to Use One
To get the results step bits are known for, stay within their sweet spot:
● Thin stock, not thick plate: Step drill bits are optimized for sheet and thin materials; for thicker plate, use hole saws or annular cutters instead.
● Rotary only: Don’t use hammer mode. Impact drivers are acceptable only if the bit is specifically rated impact-compatible by the manufacturer.
● Not a wood hole saw replacement: They’ll handle thin plywood or laminates in a pinch, but they’re not intended for deep, rough carpentry holes.
How to Choose a Step Drill Bit
Match the bit to your material, the hole sizes you need, and your tool.
Bit material
HSS (high-speed steel): General-purpose for mild steels, aluminum, copper/brass, plastics.
Cobalt-HSS (e.g., M35/M42): Better hot-hardness for stainless and tougher alloys.
Coatings
Black oxide: Adds lubricity and corrosion resistance; common on general-purpose step bits.
TiN / TiAlN (AlTiN): Higher heat and wear resistance—useful for tougher metals and longer life.
Flute design
Single vs double flute: Double flutes remove chips faster and can cut more smoothly in thin sheet.
Spiral flutes: Help with smoother cutting and chip evacuation in metals and plastics (commonly used on impact-ready models from major brands).
Step geometry and tip
Step height/increment: Determines both size coverage and how many steps contact the work; smaller increments offer finer control.
Split-point/rapid-start tip: Reduces walking and speeds the initial cut.
Shank and compatibility
1/4" hex (impact-ready): Quick changes; can be used in impact drivers if rated.
3-flat/3/8" round: Better grip in drill chucks for larger bits.
Markings and readability
Laser-etched step sizes are easy to read and help you stop on the exact diameter.
Mapping to the job
Electrical conduit: Pick a bit that includes the nominal knockout diameters. According to Eaton’s Knowledge Hub (2024), common KO hole diameters are 1/2" = 0.875" (22.2 mm), 3/4" = 1.109" (28.2 mm), and 1" = 1.375" (34.9 mm), among others.
HVAC and sheet metal: Bits that reach 1-3/8" (35 mm) cover many duct penetrations; spiral flutes help with thin galvanized sheet.
Plastics: Favor sharp, smooth-cutting geometries and plan to run at very low RPM.
How to Use a Step Drill Bit (Step-by-Step)
1. Mark and punch: Mark the center. Use a center punch for accuracy, especially on metal panels.
2. Clamp and back the work: Secure the sheet and back it with scrap to prevent chatter and blowout.
3. Set speed and lube: Use low to moderate RPM. Apply cutting fluid on metals—especially stainless and thicker mild steel—to manage heat and extend edge life.
4. Start square: Hold the tool perpendicular. Let the split-point start the hole; don’t force it.
5. Advance by steps: Drill until the desired step contacts the surface. Pause to clear chips.
6. Stop at size: When the correct step breaks through, ease off. Use the next step lightly to deburr the edge.
7. Enlarging an existing hole: Align the next step into the hole and let it “register,” then apply light pressure to enlarge cleanly.
Safety basics: Wear eye protection; keep gloves away from rotating edges; clamp small parts; avoid loose sleeves and long hair around rotating tools.
Pro Tips and Troubleshooting
● Heat is the enemy: Reduce RPM and use cutting fluid on metals. Give the bit a breather between steps on stainless.
● Chatter or out-of-round holes: Support the work better, lower speed, and use a double‑ or spiral‑flute bit.
● Burrs: After reaching size, kiss the edge with the next step for a quick chamfer.
● Plastics melting: Drop RPM significantly and use very light pressure; consider a short pecking motion to let chips clear and material cool.
● Read the markings: Rotate the chuck by hand to position the laser-marked size where you can see it as you drill.
● Follow the datasheet: Exact speeds vary by material and step diameter—defer to the bit’s specific recommendations.
Conclusion
PTATools specializes in precision-engineered step drill bits—from standard to spiral and impact-ready designs.
Browse the PTATools catalog or contact our technical team to find the ideal bit for your application


